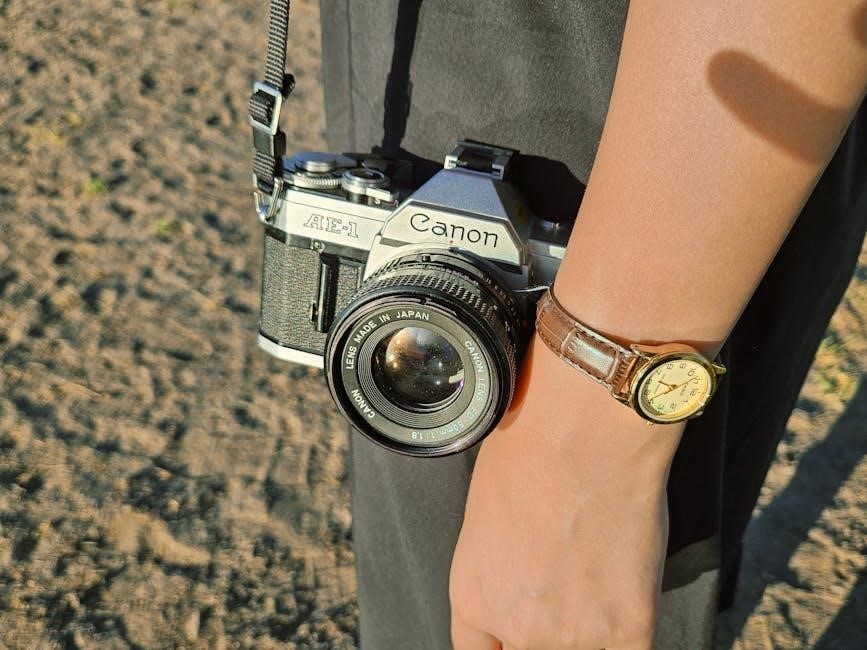
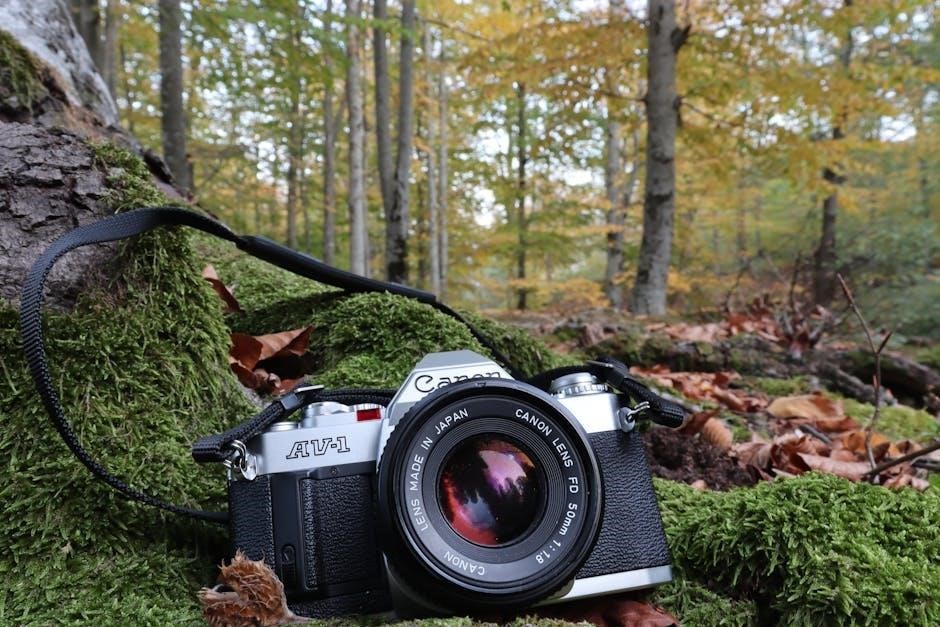
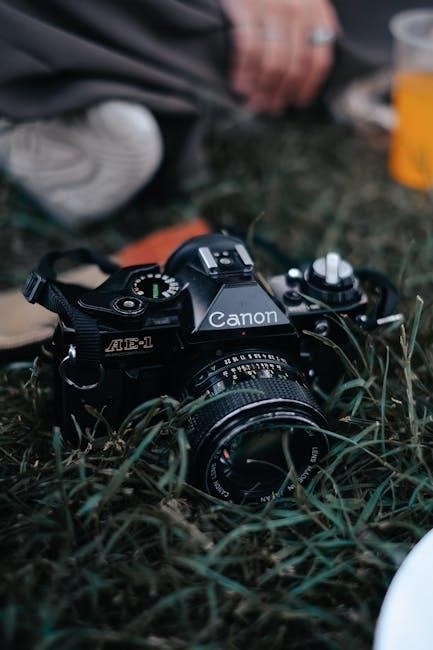
The Canon AE-1, released in 1976, revolutionized photography with its blend of affordability, compactness, and automatic exposure capabilities, achieving a remarkable 5 million units sold․
Historical Context & Significance
The Canon AE-1 emerged in 1976, a pivotal moment in photographic history, challenging established professional models with its innovative blend of features and accessible price point․ Prior to the AE-1, automatic exposure cameras often carried a hefty premium․ Canon strategically positioned the AE-1 as a compelling alternative, particularly after the introduction of the EF camera, which saw diminishing sales as the AE-1 gained traction․
While sacrificing some professional-grade features, the AE-1’s smaller, lighter body and user-friendly design democratized photography․ Its success—reaching 5 million units sold—demonstrated a shift in the market, proving that high-quality photography didn’t necessitate expensive, bulky equipment․ The AE-1’s impact extended beyond sales figures; it fostered a new generation of photographers and solidified Canon’s position as a major player in the camera industry․
Why Choose the Canon AE-1 Today?
In a digital age, the Canon AE-1 offers a refreshing analog experience, fostering creativity and a deliberate approach to photography․ Its fully manual controls encourage understanding of aperture, shutter speed, and ISO, building a strong photographic foundation․ The AE-1’s robust build quality ensures longevity, making it a reliable companion for years to come․
Furthermore, the extensive Canon FD lens mount provides access to a diverse range of affordable, high-quality lenses․ While modern cameras offer convenience, the AE-1 delivers a tactile, engaging process, and the unique aesthetic of film photography․ It’s a fantastic entry point into the world of film, offering a blend of automation and manual control, perfect for both beginners and experienced photographers․
Understanding the Camera Body
The Canon AE-1 features a durable, lightweight body housing essential components: a film chamber, shutter mechanism, exposure control system, and viewfinder for composing shots․
Key Components & Their Functions
The Canon AE-1’s core lies in its intricate interplay of components․ The shutter regulates light exposure duration, while the aperture controls light intensity and depth of field․
The film transport mechanism advances and rewinds film, crucial for sequential image capture․ The exposure meter, powered by a battery, assesses light levels for accurate settings․
The viewfinder provides a clear view of the scene, incorporating a split-image rangefinder for precise focusing․ The film counter displays the number of exposed frames․
Additionally, the AE-1 boasts various dials and levers for selecting exposure modes (Shutter-Priority, Aperture-Priority, Manual) and adjusting settings․ Understanding each component’s role is vital for mastering the camera․
Film Loading & Unloading Procedure
To load film, release the film door latch and open the back cover․ Place the film canister into the left-side chamber and thread the film leader onto the take-up spool․ Advance the film using the film advance lever, ensuring the sprocket holes engage properly․
Close the back cover until it clicks securely․ Advance the film several times and observe the film counter to confirm proper loading․ For unloading, press the film rewind button on the bottom of the camera․
Open the back cover and carefully remove the film canister․ Proper loading and unloading prevent damage to the film and camera mechanism, ensuring optimal performance․
Battery Installation & Types
The Canon AE-1 requires a 4LR44 or equivalent 6V battery to power its light meter and electronic shutter․ Locate the battery compartment on the bottom of the camera, secured by a sliding cover․ Insert the battery, observing the correct polarity (+ and -) markings inside the compartment․
Ensure the battery is firmly seated and the compartment cover is securely closed․ A weak or improperly installed battery will result in inaccurate exposure readings or camera malfunction․
Regular battery checks are crucial for reliable operation․ Alkaline or lithium batteries are suitable replacements, offering extended life․
Exposure Settings: Mastering the Basics
Understanding aperture, shutter speed, and ISO is fundamental to achieving properly exposed photographs with the Canon AE-1, controlling light and creative effects․
Aperture: Controlling Depth of Field
Aperture, represented by f-stops (like 1․8, 2, or 22), dictates the lens opening size and profoundly impacts depth of field – the area in focus․ Smaller f-numbers (e․g․, f/1․8) create a shallow depth of field, ideal for isolating subjects with blurred backgrounds, letting in more light for faster shutter speeds․ Conversely, larger f-numbers (e․g․, f/22) yield a greater depth of field, keeping more of the scene sharp, suitable for landscapes․
While mastering manual aperture control is a key benefit of using a camera like the AE-1, beginners can initially utilize automatic aperture settings to familiarize themselves with the camera’s operation․ Depth of field is crucial for artistic expression, emphasizing subjects or showcasing expansive scenes with clarity․ Experimentation is key to understanding its effects․
Shutter Speed: Capturing Motion
Shutter speed, measured in seconds or fractions thereof (e․g․, 1/60, 1/250), determines how long the camera’s sensor is exposed to light, directly influencing motion capture․ Faster shutter speeds (like 1/250) freeze motion, perfect for sports or wildlife photography․ Slower shutter speeds (e․g․, 1/30) blur motion, conveying a sense of movement, useful for waterfalls or light trails․
When shooting handheld, a general rule is to maintain a shutter speed at or above 1/60 to minimize camera shake and ensure sharp images․ Lower speeds increase the risk of blur․ Understanding the interplay between shutter speed and aperture is vital for achieving proper exposure and creatively controlling how motion is depicted in your photographs․
ISO: Film Sensitivity & Its Impact
ISO represents the sensitivity of the film to light; lower ISO values (e․g․, 100) are less sensitive, requiring more light for proper exposure, resulting in finer grain and greater detail; Higher ISO values (e․g․, 400, 800) are more sensitive, allowing for shooting in lower light conditions, but introduce more noticeable grain․
It’s crucial to set the Canon AE-1’s ISO dial to match the ISO of the film loaded in the camera․ Mismatched settings lead to incorrect exposures․ When starting, it’s wise to bracket shots – taking photos at the meter’s suggested exposure, one stop faster, and one stop slower – to determine the optimal ISO and exposure settings․
Metering & Exposure Modes
The Canon AE-1 offers shutter-priority, aperture-priority, and manual modes, providing versatile control over exposure based on your photographic vision and conditions․
Shutter-Priority AE Mode
In Shutter-Priority AE mode, you, the photographer, dictate the shutter speed, while the Canon AE-1 intelligently calculates and sets the appropriate aperture for correct exposure․ This is exceptionally useful when you need to freeze motion – selecting a fast shutter speed like 1/250th or 1/500th of a second – or intentionally blur movement with slower speeds․ The camera’s metering system analyzes the scene’s brightness and automatically adjusts the aperture to achieve a well-exposed image based on your chosen shutter speed․ Remember to keep handheld shutter speeds at or above 1/60th to minimize camera shake․ This mode empowers creative control over motion while simplifying exposure determination, making it ideal for action shots or artistic effects․
Aperture-Priority AE Mode
Canon AE-1’s Aperture-Priority AE mode allows you to select your desired aperture (f-stop), controlling the depth of field, while the camera automatically determines the correct shutter speed for proper exposure․ A smaller f-stop, like f/1․8 or f/2, creates a shallow depth of field, blurring the background and isolating your subject․ Conversely, a larger f-stop, such as f/22, maximizes depth of field, keeping both foreground and background sharp․ While mastering manual settings is beneficial, starting with automatic aperture simplifies the learning process․ This mode is perfect for portraits or landscapes where controlling what’s in focus is paramount․
Manual Exposure Mode
In Manual Exposure Mode on the Canon AE-1, you have complete control over both aperture and shutter speed, demanding a thorough understanding of the exposure triangle․ This mode requires utilizing an external light meter or the camera’s built-in metering system to determine the correct settings․ Bracketing – taking multiple shots at slightly different exposures – is highly recommended, especially when learning․ This technique involves varying the shutter speed around the meter’s suggestion to ensure a properly exposed image․ Manual mode unlocks creative potential, allowing precise control over depth of field and motion blur․
Focusing System
The Canon AE-1 utilizes a focusing screen with a split-image rangefinder, aiding in achieving sharp focus by visually aligning divided images for clarity․
Focusing Screen & Split-Image Rangefinder
The Canon AE-1’s focusing system centers around its bright focusing screen, featuring a crucial split-image rangefinder․ This ingenious tool assists photographers in attaining precise focus manually․ The split-image is a circular area in the center of the screen, divided into two contrasting sections․
When the lens is accurately focused, these two sections align perfectly, creating a seamless image․ If they are misaligned, it indicates the image is out of focus․ Rotating the focusing ring on the lens until the split image merges is how you achieve sharpness․ This method is particularly effective in low-light conditions where depth of field is shallow, demanding accurate focusing for optimal results․
Achieving Sharp Focus
Mastering sharp focus with the Canon AE-1 relies on utilizing the split-image rangefinder effectively․ Begin by composing your shot and then carefully observe the split image in the viewfinder’s center․ Slowly rotate the focusing ring on your Canon FD lens until the two halves of the split image seamlessly merge into one cohesive image․
This alignment signifies that your subject is in critical focus․ For handheld shooting, maintaining a shutter speed of 1/60th of a second or faster minimizes blur․ Remember, a shallower depth of field (achieved with wider apertures like f/1․8) demands more precise focusing than larger apertures (like f/22)․ Practice makes perfect – consistent use will refine your focusing technique․
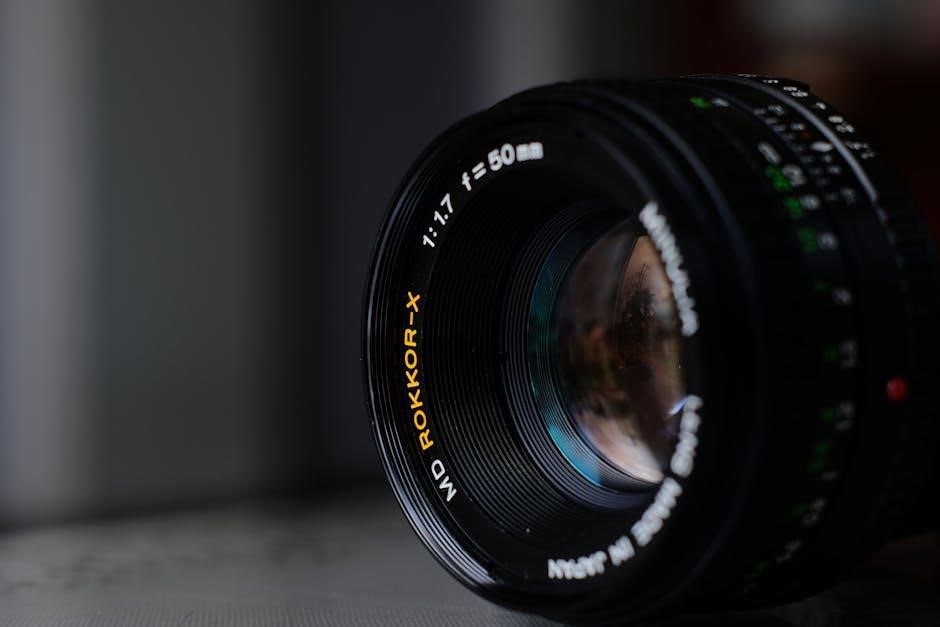
Lenses & Compatibility
The Canon AE-1 utilizes the Canon FD lens mount, offering a wide range of compatible lenses․ Adapters exist to use lenses from other systems too․
Canon FD Lens Mount
The Canon FD (Focusing Distinctive) lens mount was Canon’s standard lens mount from 1971 to 1987․ It’s a breech-lock bayonet mount, meaning lenses are inserted and then twisted to lock into place․ This system allowed for a secure connection while still being relatively easy to use․
The FD mount is known for its full-aperture metering, which means the camera meters light with the lens set to its widest aperture, providing accurate exposure readings․ However, it lacks electrical contacts for auto-diaphragm control in many lenses, requiring a mechanical linkage․ This can sometimes lead to slight exposure variations․ Despite this, the FD system boasts a vast selection of high-quality lenses, making it a popular choice for AE-1 users․
Compatible Lenses & Adapters
The Canon AE-1 is natively compatible with all Canon FD and FD New lenses․ These lenses offer a wide range of focal lengths and apertures, from wide-angle zooms to telephoto primes, catering to diverse photographic needs․ Finding FD lenses today is generally affordable, making it an accessible system․
For those wishing to use modern lenses, FD to EF adapters are readily available․ These adapters allow you to mount Canon EF lenses (and those from other manufacturers via EF adapters) onto your AE-1․ However, be aware that using adapters may result in loss of some functionality, such as auto-diaphragm control, and require manual aperture adjustment․

Advanced Features & Techniques
Mastering depth of field, utilizing external flash, and employing bracketing techniques will elevate your Canon AE-1 photography, ensuring consistently excellent results․
Depth of Field Control & Creative Effects
Depth of field, the area appearing sharp in your image, is powerfully controlled by the aperture setting on your Canon AE-1․ A smaller f-stop (like f/1;8 or f/2) creates a shallow depth of field, ideal for isolating subjects against blurred backgrounds – perfect for portraits!
Conversely, larger f-stops (like f/16 or f/22) yield a greater depth of field, bringing both foreground and distant elements into focus, suitable for landscapes․ Experimenting with these settings unlocks creative possibilities․
Utilize shallow depth of field to draw attention to specific details, or maximize depth of field to capture expansive scenes with clarity․ Remember, aperture directly impacts both sharpness and light intake, influencing your shutter speed choices․
Using External Flash
The Canon AE-1 offers a hot shoe for connecting external flash units, expanding your lighting capabilities beyond natural light․ When using flash, remember the flash synchronization speed – typically 1/60th of a second – to avoid dark bands appearing in your images․
External flash provides greater control over light intensity and direction compared to the built-in flash (if available with an adapter)․ Experiment with bouncing the flash off ceilings or walls for softer, more diffused lighting․
Consider using a flash bracket to move the flash away from the camera lens, minimizing red-eye and creating more natural-looking shadows․ Mastering flash photography unlocks creative potential for low-light situations and dramatic effects․
Bracketing for Accurate Exposure
When unsure about the correct exposure, bracketing is a valuable technique․ This involves taking multiple shots of the same scene with varying exposure settings․ Start with the exposure suggested by your light meter or the camera’s automatic modes․
Then, take one photo with a faster shutter speed (or smaller aperture) – underexposing the image – and another with a slower shutter speed (or larger aperture) – overexposing it․
This creates a series of images, increasing the likelihood of capturing a perfectly exposed shot․ Bracketing is especially useful in challenging lighting conditions or when shooting critical scenes where accurate exposure is paramount․
Troubleshooting Common Issues
Common problems include light leaks, shutter malfunctions, and metering errors; careful inspection and cleaning can often resolve these issues, ensuring optimal camera performance․
Light Leaks & How to Prevent Them
Light leaks in the Canon AE-1 often manifest as unwanted flares or washes on your film, typically appearing as bright streaks or fogging․ These usually stem from gaps in the light seals surrounding the film door, back door, and even around the lens mount․ Regularly inspect these seals for deterioration – crumbling or stickiness are key indicators․
Replacing these seals is a relatively straightforward DIY project, with kits readily available online․ Ensure the film door closes securely and that the back door latches firmly․ Also, check the foam around the lens mount; damaged foam can allow light to enter․ Careful cleaning of the camera body and meticulous film loading also contribute to preventing frustrating light leaks, preserving the integrity of your images․
Shutter Problems & Solutions
Shutter issues on the Canon AE-1 can range from slow speeds to complete failure․ A common culprit is dried-up lubricant within the shutter mechanism, causing sluggish operation․ Avoid attempting complex repairs yourself unless you possess significant technical expertise; improper disassembly can cause further damage․
If the shutter fires inconsistently, try gently exercising it at various speeds․ A professional CLA (Clean, Lubricate, and Adjust) service is often the best solution for persistent shutter problems․ This involves a complete disassembly, cleaning, lubrication, and recalibration of the shutter mechanism․ Never force the shutter; doing so could lead to irreversible damage and costly repairs․
Metering Errors & Calibration
Inaccurate metering on the Canon AE-1 can result in consistently over- or underexposed images․ Battery issues are a frequent cause; ensure a fresh battery is installed and the contacts are clean․ If the problem persists, the metering cell itself may be faulty or require recalibration․
Recalibration is best left to a qualified camera technician, as it involves adjusting internal potentiometers․ As a temporary workaround, bracket your exposures – take shots at the meter’s reading, one stop faster, and one stop slower – to ensure proper exposure․ Regularly check your meter against a known accurate light meter to identify any significant discrepancies․

Maintenance & Care
Regularly clean the Canon AE-1’s body and lens with a soft cloth; Store it in a dry place, away from direct sunlight, to prevent damage and ensure longevity․
Cleaning the Camera Body & Lens
Maintaining your Canon AE-1 involves gentle cleaning practices․ For the camera body, use a soft, dry microfiber cloth to wipe away dust and fingerprints․ Avoid harsh chemicals or abrasive cleaners, as these can damage the finish․ Pay particular attention to the film compartment and battery chamber, ensuring they are free of debris․
When cleaning the lens, use a lens brush to remove loose dust particles first․ Then, apply a few drops of lens cleaning solution to a clean microfiber lens cloth and gently wipe the lens surface in a circular motion․ Avoid applying liquid directly to the lens․ Inspect for streaks and repeat if necessary․ Proper lens care is crucial for maintaining image quality and preventing scratches․
Proper Storage Techniques
To preserve your Canon AE-1’s functionality, proper storage is essential․ Ideally, store the camera in a cool, dry place away from direct sunlight and extreme temperatures․ A camera bag or case offers excellent protection against dust, moisture, and accidental impacts․ Remove the batteries before long-term storage to prevent corrosion․
If storing for an extended period, consider using a desiccant packet inside the camera bag to absorb any residual moisture․ Avoid storing the camera in damp basements or hot attics․ Regularly check the camera for signs of mold or corrosion, especially if stored in humid environments․ Careful storage ensures your AE-1 remains ready for your next photographic adventure․
Resources & Further Learning
Explore online manuals and vibrant communities for Canon AE-1 support․ Numerous books and tutorials offer in-depth guidance for mastering this classic camera․
Online Manuals & Communities
Delving into the Canon AE-1’s capabilities is greatly aided by the wealth of resources available online․ Numerous websites host digitized versions of the original Canon AE-1 camera manual, offering detailed explanations of every function and feature․ Beyond the official documentation, thriving online communities dedicated to film photography provide invaluable support․
These forums and groups are excellent places to ask questions, share experiences, and learn from fellow enthusiasts․ Websites like Flickr and Reddit host dedicated Canon AE-1 groups where users showcase their work and offer advice․ Exploring these platforms can unlock a deeper understanding of the camera and inspire creative experimentation․ Don’t hesitate to leverage the collective knowledge of the film photography community!
Recommended Books & Tutorials
While online resources are plentiful, supplementing your learning with dedicated books and tutorials can significantly enhance your understanding of the Canon AE-1․ Several publications offer comprehensive guides to film photography, specifically addressing the nuances of using classic cameras like the AE-1․ Look for titles focusing on mastering manual exposure, understanding depth of field, and effectively utilizing different lenses․
YouTube also hosts a wealth of video tutorials, ranging from beginner-friendly introductions to advanced techniques․ These visual guides can be particularly helpful for understanding complex concepts like metering and focusing․ Consider searching for tutorials specifically tailored to the Canon AE-1 to maximize your learning experience and unlock the camera’s full potential․