
Senville Mini Split Remote Control Manual: A Comprehensive Guide
This comprehensive guide provides detailed instructions for operating your Senville mini-split system effectively. It covers everything from basic functions to advanced settings, ensuring optimal comfort and energy efficiency. Refer to this manual for troubleshooting tips and accessing online resources.

Senville mini-split systems offer a versatile and efficient solution for heating and cooling residential and commercial spaces. These ductless systems are known for their energy-saving capabilities and ease of installation compared to traditional central air conditioning. Senville systems come equipped with advanced features, including inverter technology, which adjusts the compressor speed to match the cooling or heating demand, resulting in significant energy savings.
Senville offers a range of mini-split models, including the Aura and Leto series, each designed to meet specific needs and preferences. These systems provide individual zone control, allowing you to customize the temperature in different rooms for personalized comfort. Furthermore, many Senville units are compatible with Wi-Fi control, enabling you to manage your air conditioning system remotely using your smartphone or tablet.

The Senville mini-split systems prioritize user-friendliness, including an intuitive remote control. The remote allows effortless adjustments to temperature, fan speed, and operating mode, enhancing your overall comfort experience. Understanding the remote’s functions is crucial for maximizing the system’s potential and achieving optimal performance.
Understanding the Senville Remote Control
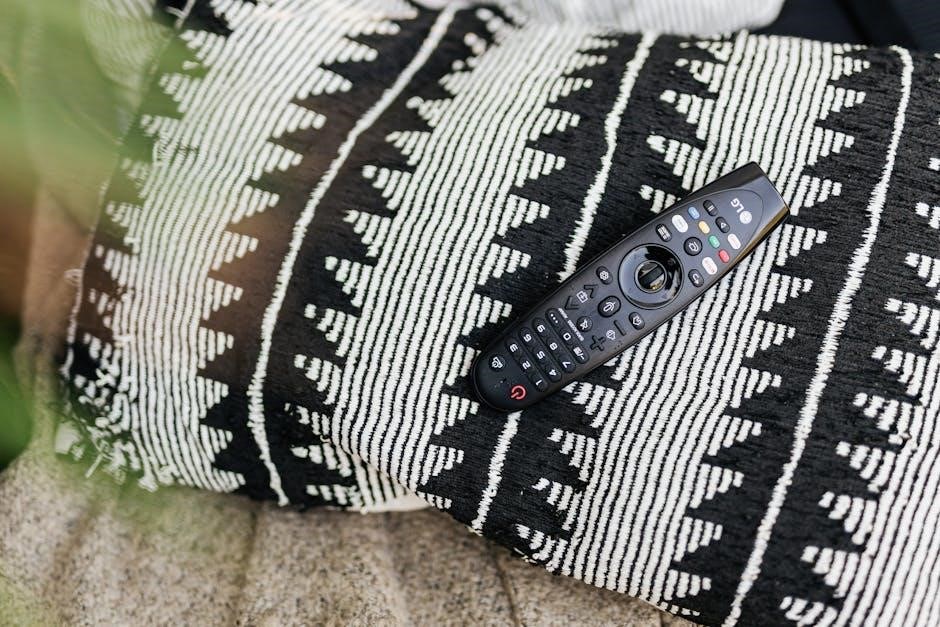
The Senville remote control is the primary interface for managing your mini-split system. It allows you to adjust temperature settings, change operating modes, set timers, and control fan speeds from a distance. Familiarizing yourself with the remote’s layout and functions is essential for optimal control and comfort. The remote communicates with the indoor unit via infrared signals; therefore, it’s crucial to point the remote directly at the unit for proper operation.
Different Senville models may have slightly different remote control designs, but the core functions remain consistent. The remote typically includes buttons for power, mode selection (cool, heat, auto, dry, fan), temperature adjustment, fan speed control, timer settings, and sleep mode. Some remotes also feature advanced functions like louver angle adjustment and Wi-Fi control (if applicable).
This guide will provide a detailed overview of the remote’s functions, explaining how to use each button and setting to achieve your desired comfort level. We will also cover troubleshooting common remote control issues, such as signal problems and battery replacement, ensuring you can maintain seamless control over your Senville mini-split system.
Remote Control Overview and Specifications
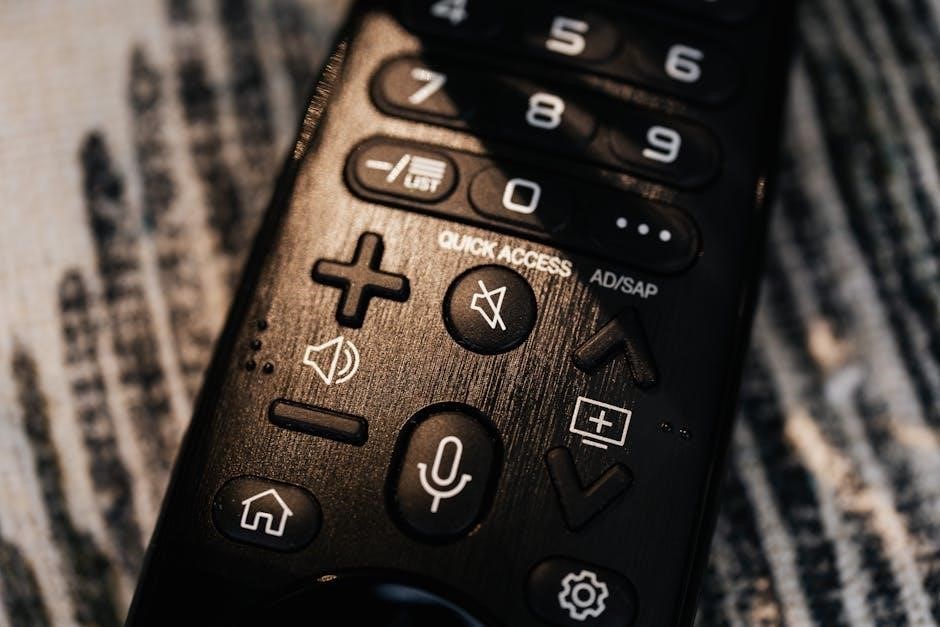
The Senville mini-split remote control is designed for intuitive operation and comprehensive control over your air conditioning system. This section provides an overview of the remote’s physical layout, button functions, and technical specifications. Understanding these details will enable you to effectively utilize the remote’s capabilities and optimize your comfort.
Typically, the Senville remote features a clear LCD screen displaying the current settings, including temperature, mode, fan speed, and timer status. The buttons are logically arranged for easy access to frequently used functions. Key buttons include Power, Mode, Temperature Up/Down, Fan Speed, Timer, and Sleep. Some models may also include specialized buttons for features like louver control, turbo mode, or Wi-Fi connectivity.
The remote operates on standard AAA batteries (usually two), providing long-lasting power. The infrared (IR) transmitter ensures reliable communication with the indoor unit within a reasonable range. Ensure the remote is pointed directly at the indoor unit’s IR receiver for optimal performance. The remote’s specifications may vary slightly depending on the Senville model, so always refer to your specific model’s manual for detailed information.
Basic Functions of the Senville Remote
The Senville remote control offers several fundamental functions to manage your mini-split system. Mastering these basic operations ensures comfortable and efficient climate control. These functions include powering the unit on and off, selecting the desired operating mode, adjusting the temperature, and controlling the fan speed. Understanding these core features is essential for everyday use.
The Power button, typically marked with a universal power symbol, activates or deactivates the air conditioning system. Pressing the Mode button allows you to cycle through different operating modes such as Cool, Heat (if applicable), Dry (dehumidifying), Fan, and Auto. Each mode is designed for specific environmental conditions and comfort preferences. Temperature adjustment is achieved using the Up and Down arrow buttons, allowing you to set your desired room temperature.

Fan speed control lets you regulate the airflow intensity. Options usually include Auto, Low, Medium, and High. Auto mode adjusts the fan speed automatically based on the cooling or heating demand. Experimenting with these basic functions will help you discover the optimal settings for your environment and personal comfort.
Power On/Off and Mode Selection

The primary function of the Senville remote is, of course, to power the mini-split system on and off. The Power button, clearly designated with a power icon, initiates or terminates the system’s operation. A single press typically activates the unit, while another press turns it off. Confirm that the indoor unit receives the signal, usually indicated by a beep or a light.
Mode selection is another crucial basic function. The Mode button allows you to choose the operational mode that best suits your needs. Available modes often include Cool, Heat (for heat pump models), Dry (dehumidification), Fan, and Auto. In Cool mode, the system lowers the room temperature. Heat mode, conversely, warms the room. Dry mode reduces humidity levels, while Fan mode circulates air without heating or cooling. Auto mode intelligently selects the appropriate mode based on the ambient temperature.
Experimenting with different modes ensures optimal comfort and energy efficiency. For instance, using Dry mode on humid days can significantly improve indoor air quality. Understanding these modes is vital for effectively utilizing your Senville mini-split system.
Temperature Adjustment and Fan Speed Control
Adjusting the temperature is fundamental to achieving desired comfort levels with your Senville mini-split system. The remote control features dedicated Up and Down buttons, typically marked with “+” and “-” symbols, respectively. Pressing the Up button increases the target temperature, while pressing the Down button decreases it. The current set temperature is usually displayed prominently on the remote’s LCD screen. Adjustments are made in increments, often of 1 degree Fahrenheit or Celsius, depending on the unit’s settings.
Fan speed control allows you to regulate the airflow and cooling or heating intensity. The Fan button cycles through different fan speed settings, such as Auto, Low, Medium, and High. Auto fan speed automatically adjusts the fan’s speed based on the room temperature and the selected mode. Low speed provides gentle airflow and quieter operation, while High speed delivers maximum cooling or heating power. Selecting the appropriate fan speed enhances comfort and optimizes energy consumption.
Experiment with different temperature and fan speed combinations to find the settings that best suit your preferences and environmental conditions.
Advanced Functions of the Senville Remote
Beyond the basic functions, the Senville remote offers a range of advanced features to customize your comfort experience. One common function is the “Turbo” or “Powerful” mode, which maximizes the unit’s cooling or heating output for a short period, quickly reaching the desired temperature. Another useful feature is the “ECO” mode, designed to conserve energy by optimizing the unit’s operation based on pre-set parameters; This mode typically adjusts the temperature and fan speed to minimize power consumption without sacrificing comfort.

Some Senville models also include a “Follow Me” or “I Feel” function. When activated, the remote’s built-in temperature sensor is used to monitor the ambient temperature around the remote itself, rather than the unit. This ensures that the unit adjusts its output to maintain the desired temperature in the area where the remote is located, providing more personalized comfort.
Furthermore, certain remotes offer louver control, allowing you to adjust the direction of the airflow, either vertically or horizontally. This ensures optimal air circulation and prevents uncomfortable drafts. Explore your remote’s advanced functions to tailor your Senville mini-split system to your specific needs and preferences.
Timer Settings and Sleep Mode
The timer function on your Senville remote provides convenient control over the operating schedule of your mini-split system. You can set the unit to turn on or off at a specific time, allowing you to pre-cool or pre-heat a room before you arrive, or to automatically shut off the unit after you fall asleep. This feature promotes energy savings and ensures a comfortable environment without constant manual adjustments.
To set the timer, consult your remote’s user manual for detailed instructions, as the specific procedure may vary slightly depending on the model. Generally, you will use the timer button to specify the desired on or off time, and then confirm the setting. Some remotes even allow you to program multiple timer events for different days of the week, further enhancing your control over the system’s operation.
The sleep mode is another valuable feature designed to enhance comfort during sleep while minimizing energy consumption. When activated, the sleep mode gradually adjusts the temperature over a period of time, typically increasing the temperature slightly during cooling mode or decreasing it slightly during heating mode. This prevents the room from becoming too cold or too hot during the night, ensuring a more restful sleep while also reducing energy waste.
Troubleshooting Common Remote Control Issues
Encountering issues with your Senville mini-split remote control can be frustrating, but many common problems can be easily resolved. One frequent issue is the remote failing to communicate with the indoor unit. Before assuming a major malfunction, ensure that the remote’s batteries are fresh and properly installed, paying close attention to the polarity (+ and -) markings.
Another common cause of communication problems is obstruction. Make sure there is a clear line of sight between the remote and the indoor unit’s infrared receiver. Objects blocking the signal, such as furniture or curtains, can prevent the remote from functioning correctly. Also, ensure that the infrared signal receiver on the indoor unit is not exposed to direct sunlight, as this can interfere with the signal reception.
If the remote still doesn’t work after checking the batteries and line of sight, try resetting the remote by removing the batteries for a few minutes and then reinserting them. If the problem persists, consult your Senville mini-split system’s user manual for additional troubleshooting steps specific to your model; The manual may provide guidance on error codes or other diagnostic information that can help pinpoint the issue. If all else fails, consider contacting Senville’s customer support for further assistance.
Infrared Signal Problems and Solutions
Infrared (IR) signal issues are a common cause of remote control malfunctions with Senville mini-split systems. The remote communicates with the indoor unit via an IR signal, and any interference or obstruction can disrupt this communication. A primary culprit is distance; ensure you are within the recommended operating range of the remote, typically several meters, and pointing it directly at the indoor unit’s receiver.
External factors can also impede the IR signal. Bright sunlight or strong fluorescent lighting can overwhelm the receiver, preventing it from detecting the remote’s signal. Try dimming the lights or shielding the indoor unit from direct sunlight to see if this resolves the issue. Additionally, other electronic devices emitting IR signals, such as TVs or sound systems, can cause interference. Try turning off nearby devices temporarily to isolate the problem.
If signal interference isn’t the problem, inspect the remote’s IR emitter (usually a small LED at the front) for any damage or blockage. Clean it gently with a soft, dry cloth. For the receiver on the indoor unit, ensure it’s clean and free from dust or debris. If problems persist, consider testing the remote with an IR signal tester (available online) or using a smartphone camera (which can sometimes detect IR light) to verify that the remote is actually emitting a signal. If not, the remote may be faulty and require replacement.
Replacing the Remote Control Batteries
When your Senville mini-split remote control starts to exhibit erratic behavior or fails to operate, the first and simplest solution to consider is replacing the batteries; Most Senville remotes utilize either AAA or AA batteries, typically two in number. The battery compartment is usually located on the back of the remote and is secured by a small latch or cover that slides or pops open.
To replace the batteries, first, locate the battery compartment and carefully open it. Remove the old batteries, noting their orientation (+ and -) to ensure correct placement of the new batteries. It is recommended to use high-quality alkaline batteries for optimal performance and longevity. Insert the new batteries into the compartment, matching the + and — markings inside the compartment with the corresponding ends of the batteries.
Once the new batteries are inserted, securely close the battery compartment. Test the remote by pressing a button, such as the power button, and verifying that the indoor unit responds accordingly. If the remote still fails to operate after replacing the batteries, double-check that the batteries are inserted correctly and that the battery compartment is closed securely. If the issue persists, there may be a different problem with the remote or the mini-split system itself, warranting further troubleshooting or professional assistance. Always dispose of used batteries responsibly, following local regulations.
Finding the Correct Replacement Remote
If replacing the batteries doesn’t solve the problem with your Senville mini-split remote, you might need a replacement. Finding the correct replacement remote is crucial for ensuring compatibility and proper functionality with your specific Senville unit. The easiest way to identify the correct remote is to locate the model number of your original remote. This number is typically printed on the back of the remote, often in small lettering.

Once you have the model number, you can search online retailers like Amazon or specialized HVAC parts suppliers. When searching, be sure to include “Senville” and the remote model number to narrow down the results. If you cannot find the model number, you can try searching using the model number of your Senville mini-split indoor unit. Some retailers offer remote finders that allow you to input your unit’s model number to identify compatible remotes.
Alternatively, you can contact Senville directly or visit their official website. They may have a list of compatible remotes for each of their mini-split models. When contacting Senville, be prepared to provide the model number of your indoor unit. Be cautious of generic or universal remotes that claim to be compatible with various brands. While some may work, they might not offer full functionality or may not be as reliable as an original Senville remote. Investing in a genuine Senville replacement remote ensures seamless operation and avoids potential compatibility issues.
Senville Remote Control Manuals and Resources
Accessing the correct Senville remote control manual and related resources is key to understanding and maximizing the functionality of your mini-split system. Senville provides a range of resources to assist users, including online manuals, installation guides, and customer support channels. The primary source for manuals is typically the Senville website. Navigate to the “Support” or “Downloads” section, where you can find PDF versions of the remote control manual specific to your mini-split model.
These manuals contain detailed information about each button, function, and setting on your remote, accompanied by diagrams and troubleshooting tips. In addition to the remote control manual, consider downloading the installation and service manuals for your Senville mini-split unit. These manuals provide valuable insights into the system’s overall operation and maintenance procedures. If you cannot find the manual online, contact Senville’s customer support for assistance. They can often provide you with a digital copy or direct you to the appropriate resource.
Furthermore, online forums and communities dedicated to HVAC systems can be valuable resources for finding answers to specific questions or issues related to your Senville remote control. Many users share their experiences and solutions, offering helpful tips and alternative perspectives. Before seeking help from online forums, be sure to have your mini-split model number and remote control information readily available to ensure you receive accurate and relevant assistance.
Accessing Online Manuals and Support
Finding the right resources for your Senville mini-split remote control is easier than ever, thanks to the readily available online manuals and support options. Start by visiting the official Senville website. Their website typically hosts a comprehensive library of manuals categorized by product model. Look for a “Support,” “Downloads,” or “Resources” section to locate your specific remote control manual. These manuals are usually in PDF format, allowing you to easily download and save them for offline access.
When searching for your manual, ensure you have the correct model number of your mini-split system. This information can usually be found on the unit itself or in your original purchase documentation. In addition to manuals, the Senville website often provides FAQs, troubleshooting guides, and video tutorials to assist you with common issues. If you cannot find the manual or require further assistance, Senville’s customer support team is available to help. You can typically reach them via phone, email, or live chat through their website.

Be prepared to provide them with your model number and a detailed description of the issue you are experiencing. Furthermore, consider exploring online forums and communities dedicated to HVAC systems. These platforms can offer valuable insights and solutions from other Senville users. Remember to exercise caution when following advice from unofficial sources and always prioritize the information provided in the official Senville manuals and support channels.
Installation and Service Manuals
While this guide primarily focuses on the remote control, accessing installation and service manuals for your Senville mini-split system is also crucial for comprehensive maintenance and troubleshooting. Installation manuals provide detailed instructions on setting up the unit, including wiring diagrams and refrigerant handling procedures. These manuals are essential for ensuring your system operates safely and efficiently. Service manuals, on the other hand, are intended for qualified technicians and contain in-depth information on diagnosing and repairing potential issues.
These manuals include detailed schematics, troubleshooting flowcharts, and component-level information. Both installation and service manuals can typically be found on the Senville website or through authorized distributors. When searching for these manuals, be sure to have your system’s model number readily available. It’s also important to note that attempting to install or service a mini-split system without proper training and certification can be dangerous and may void your warranty.
Therefore, always consult with a qualified HVAC professional for any installation or repair work. However, having access to these manuals can be beneficial for understanding your system’s operation and communicating effectively with technicians. Furthermore, some online resources and forums may offer helpful tips and insights based on these manuals, but always prioritize safety and consult with a professional when in doubt. Remember that Quebec customers can find French versions of installation manuals on the Senville website.